

Table of Contents
- Why Your Treadmill Belt Is Slipping
- What You'll Need Before Starting
- Step 1: Perform a Visual Diagnostic
- Step 2: Adjust Belt Tension with the Tension Bolt
- Step 3: How to Lubricate Treadmill Belt Properly
- Step 4: Treadmill Belt Alignment Guide
- Signs of a Worn Out Treadmill Belt
- Post-Repair Performance Testing
Last Updated: August 29, 2026
Why Your Treadmill Belt Is Slipping
A treadmill slipping belt is one of the most common issues users encounter, and it's almost always fixable without professional service. The belt slips because of inadequate tension, misalignment, insufficient lubrication, or a combination of these factors. The problem typically manifests as the belt moving beneath your feet while you walk or run, creating a sensation of losing traction. Most cases stem from normal wear and tear rather than a manufacturing defect.
Wild Bloom's anti-slip, shock-absorbing belt design minimizes this issue, but even quality equipment requires periodic maintenance. Most fixes take under 30 minutes and require only basic tools. Ignoring a slipping belt can accelerate wear on the motor and running deck, turning a simple adjustment into a costly repair.
What You'll Need Before Starting
Gather these items before you begin troubleshooting your treadmill slipping belt:
Essential tools:
- Hex wrench or Allen key (typically 3mm, 4mm, or 5mm, check your manual)
- Silicone lubricant or treadmill belt dressing
- Flashlight or headlamp for visibility under the belt
- Clean cloth or paper towels
Safety items:
- Unplugged power cord (the most critical step)
- Safety key removed from the console
Before touching anything, unplug the treadmill and remove the safety key. This prevents accidental startup. Many injuries occur when people assume the machine is off but it powers on unexpectedly. Wait at least two minutes before beginning work to allow the motor to fully stop and cool.
Check your owner's manual for the specific hex wrench size needed for your tension bolts. Most treadmills use either 4mm or 5mm. Using the wrong size can strip the bolt, making future adjustments impossible.
Step 1: Perform a Visual Diagnostic
The first step in fixing a treadmill slipping belt is identifying what's actually wrong. Visual inspection reveals whether you're dealing with a tension issue, alignment problem, wear, or lubrication deficiency.
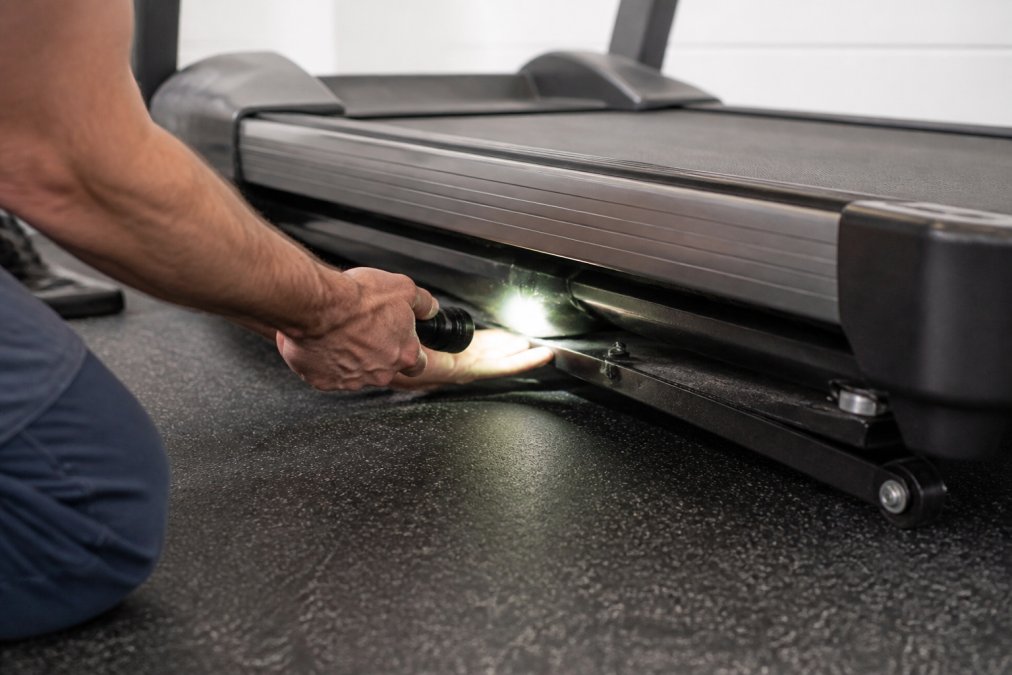
Start by examining the belt's underside. Lie down or crouch beside the treadmill and look under the belt with a flashlight. Check for visible wear, fraying edges, or torn sections. If the belt shows significant cracking or separation of layers, replacement is necessary.
Next, assess belt alignment. The belt should sit centered between the two rollers. Manually spin the belt by hand (with the power cord unplugged) and watch how it tracks. Does it drift left or right?
Inspect the rear roller and motor pulley for debris, dust, or buildup. Use a clean cloth to wipe both the top and underside of the belt where it contacts the deck. Finally, walk on the belt at a slow speed (with the safety key inserted) to feel exactly where slipping occurs. This tactile feedback narrows down whether the issue is tension, alignment, or lubrication.
Step 2: Adjust Belt Tension with the Tension Bolt
Most treadmill slipping belt issues resolve with a simple tension adjustment. The tension bolt controls how firmly the belt grips the rear roller.
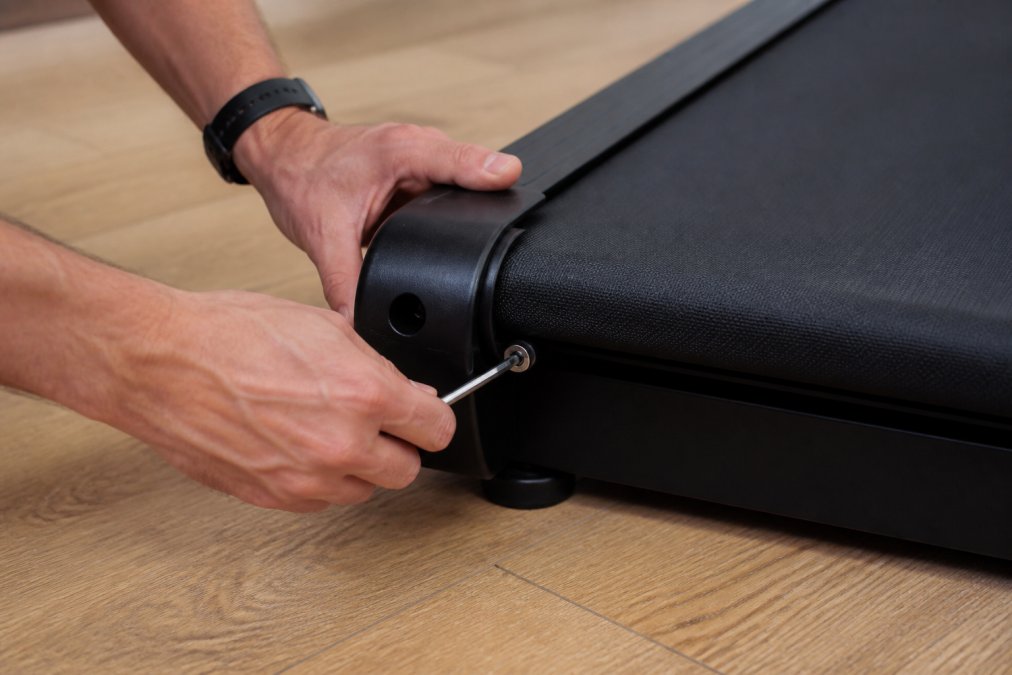
Locate the tension bolts at the rear of the treadmill, typically one on each side. Insert the hex wrench into the bolt head and turn it counterclockwise to loosen or clockwise to tighten. Most adjustments require only a quarter to half turn.
The correct tension feels firm but not locked. With the treadmill unplugged, try to manually pull the belt sideways at the center. You should be able to lift it roughly half an inch to one inch (osha.gov). Make small adjustments in quarter-turn increments, tightening both bolts equally to maintain even tension.
After each adjustment, manually spin the belt several times to feel for changes. Then plug in the treadmill, insert the safety key, and walk at a slow speed to test. The belt should feel stable and responsive. Common mistake: over-tightening. Excessive tension accelerates wear on the motor, rollers, and belt itself. If you've tightened the bolts and the belt still slips, the problem likely isn't tension, it's alignment or lubrication.
Step 3: How to Lubricate Treadmill Belt Properly
Lubrication reduces friction between the belt and the running deck, allowing the belt to move freely while maintaining traction. Most treadmills require lubrication every three to six months, depending on usage frequency (the CDC).
Apply silicone lubricant or belt dressing to the underside of the belt, not the top surface. With the treadmill unplugged, lift the belt slightly and spray or apply lubricant in a thin, even line along the center of the running deck. Don't oversaturate; excess lubricant attracts dust and debris.
After applying lubricant, manually rotate the belt several times to distribute it evenly across the entire underside. Then wipe away any excess with a clean cloth.
Use silicone-based lubricants specifically designed for treadmill belts. Avoid WD-40 or general-purpose oils, which are too thin and evaporate quickly. Some manufacturers provide their own branded lubricant; using the recommended product protects your warranty.
Test the belt after lubrication by walking at a slow speed. The belt should feel smoother and more responsive. If slipping continues, the problem is likely tension or alignment, not lack of lubrication.
Step 4: Treadmill Belt Alignment Guide
A misaligned belt is one of the most common causes of a treadmill slipping belt sensation. Even if tension is correct, poor alignment disrupts the contact between your feet and the belt.
Belt alignment means the belt sits centered between the two rollers, with equal clearance on both sides. To check alignment, manually spin the belt and observe its position. Does it drift toward one edge?
The rear roller controls belt alignment. Most treadmills have adjustment bolts on the rear roller shaft. If the belt drifts left, turn the left adjustment bolt clockwise by a quarter turn. If the belt drifts right, turn the right adjustment bolt clockwise. Make small adjustments; quarter turns are usually sufficient.
After each adjustment, manually spin the belt and check its position. Repeat until the belt sits centered with even clearance on both sides. Then test by walking at a slow speed. The belt should feel stable and centered under your feet.
Signs of a Worn Out Treadmill Belt
Some treadmill slipping belt problems can't be fixed with adjustment or lubrication, the belt itself has reached the end of its life.
Visible cracking or splitting in the belt surface indicates structural failure. Deep cracks that penetrate multiple layers require replacement. Fraying edges suggest the belt is coming apart. Examine the sides of the belt where it meets the deck. If you see loose fibers, torn rubber, or exposed webbing, the belt is deteriorating.
Excessive slipping despite proper tension and alignment indicates belt degradation. If you've adjusted tension multiple times and the belt still slips, the friction properties have diminished. Unusual noises, squeaking, grinding, or thumping, often accompany belt wear.
Most treadmill belts last two to five years with regular maintenance (peer-reviewed research). Heavy daily use reduces this timeframe. If your belt is approaching the end of this range and showing multiple warning signs, replacement is more cost-effective than repeated repairs.
Post-Repair Performance Testing
After making adjustments to fix your treadmill slipping belt, proper testing confirms the repairs worked.
Start with a visual inspection. Manually spin the belt and confirm it's centered and tracking straight. There should be even clearance on both sides with no rubbing against the side guards.
Next, power on the treadmill and run it at the slowest speed without stepping on it. Listen for grinding, squeaking, or other abnormal sounds. Watch the belt's movement; does it stay centered?
Now perform a walk test. Start at the slowest speed and gradually increase. Pay attention to how the belt feels under your feet. Does it grip consistently throughout your stride? Walk for at least five minutes to allow the belt to warm up. Belt behavior often changes as the belt heats.
Test at your normal walking or running speed. The belt should feel responsive and stable. Your foot should not slide forward or backward relative to the belt. If slipping persists after all adjustments, check whether you've over-tightened the tension bolts. Loosen slightly and retest.
Fixing a treadmill slipping belt typically requires addressing one or more of three issues: tension, alignment, or lubrication. Wild Bloom's anti-slip belt design and shock-absorbing running surface reduce the likelihood of slipping, but all treadmills benefit from periodic maintenance. Start with visual diagnostics, make small tension adjustments, apply appropriate lubrication, and verify alignment. Most users resolve slipping issues within 30 minutes using basic tools. If slipping persists after these steps, the belt may be worn and require replacement. Regular maintenance, checking tension quarterly, lubricating every three to six months, and inspecting for wear, prevents most slipping problems and extends belt life significantly. For Wild Bloom treadmill users, our no-assembly design and straightforward maintenance access make these repairs simple and quick, keeping your equipment performing smoothly for years to come.
Frequently Asked Questions
How often should you tighten a treadmill belt?
Check belt tension every 3-6 months if you use your treadmill regularly. Most belts gradually stretch over time due to normal wear and tear. A simple walk test, where the belt should resist but move smoothly under your feet, tells you when adjustment is needed. New treadmills may need one tension check in the first month before stabilizing.
Why is my treadmill belt slipping, and what's the fastest fix?
Slippage usually stems from loose tension, inadequate lubrication, or misalignment. Start with a tension adjustment using the rear tension bolts, this solves 70% of slipping issues. If the belt still slips after tightening, apply silicone lubricant to the underside of the belt and deck. Always perform a walk test after each adjustment to confirm the fix.
Can a loose treadmill belt cause motor damage?
Yes. A slipping belt reduces friction and forces the drive motor to work harder to maintain speed, increasing wear on the motor pulley and internal components. Prolonged slippage can shorten your motor's lifespan and lead to costly repairs. Fix belt tension promptly to protect your investment and ensure consistent performance.
What's the difference between belt tension and belt alignment?
Tension controls how tightly the belt grips the deck; alignment ensures the belt tracks straight down the center. A tight, misaligned belt will still slip or wear unevenly. Both adjustments are often needed together. Use the walk test to check tension, and observe whether the belt drifts left or right during use to identify alignment issues.
This article was written using GrandRanker